Posts

2021 Tilt-Top Stand

Image
As with most who begin dabbling in woodworking, you think "wouldn't it be nice to have ..." more tools in your workshop. Well, that's my situation. A friend mentioned that their neighbor was wanting to clean out their basement of her deceased husband's woodworking "stuff". Well, after checking out what was there, and the great prices, I decided it was time to add more tools to my garage shop. However, with the only space available in my garage being one wall, I had to figure a way to add these new tools and make them accessible.  After hours of perusing Pinterest, YouTube, and Facebook Woodworking Groups, I decided it was time to build a Tilt-Top Tool Stand.  This concept allows me to mount a different tool on either side of the tilt table. To use either, I simply flip the table 180 degrees.  I found several designs to consider, but decided to open up my SketchUp Make 2017 CAD program and design my own version.  Since I am still "learning" the...
2021 DIY Dog Ramp

Image
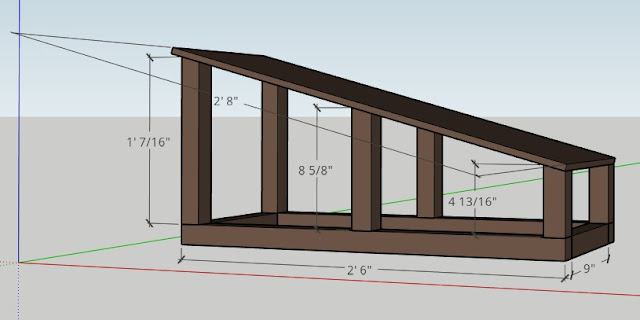
For those of you who have an aging dog, its likely that you have investigated steps or ramps to assist them in accessing chairs, couches and beds. There are several options available for purchase. However, I thought this might be a simple project to undertake, using basic wood material and carpeting.  Design As with most of my home projects, I first start by modeling on the free web modeling software - SketchUp . My plan was to construct this ramp using 2x2's, plywood, and carpeting. 1st decision to make - steps vs. ramp. I opted to go with a ramp, as it is simpler in design & fabrication, and it likely would be easier for our dog to use (Our dog is a smaller one ~15-20 lbs).  Next decision - size . I needed to determine a physical size that would a) be high enough to access furniture surfaces the dog uses, b) big enough for the dog to climb, and c) utilizes common material sizes to minimize cuts. We currently have some small "footstools" that the dog has used to get...

Simple Workbench for Garage or Basement

Image
 In my previous post, I started the renovation of my garage "workshop" by reorganizing my tools. After installing a wall area with peg board, I constructed a storage rack for my cordless power tools .  The next step of my garage makeover was to construct a simple workbench. With limited wall space in the garage, the workbench needed to compact, yet big enough for working on smaller projects. Additionally, I wanted it to also function as a storage space for small items, and also allow for storage underneath.  Design My 1st step was to determine the workbench size. With sheets of 2ft by 4ft plywood readily available at local stores (I used Menards for this project), I decided to save extra wood cutting and use this as the surface footprint. Next, I decided that a 2nd shelf below the main work surface would be great for storing some larger items, keeping them off the floor. Finally, I wanted a way to store small items used at the workbench, so I decided to add 2 small storag...

Simple Storage Rack for Cordless Power Tools

Image
If you have stepped into the cordless power tool world, you know there many available, and of course, in all different shapes and sizes. Trying to find a way to store them, but still have easy access can be a challenge.  This past year I decided to expand my tool set and began purchasing a variety of cordless power tools. In my case I opted for the Dewalt brand, which allowed the batteries to be used on all tools. When purchasing these tools, Dewalt usually provides a "storage bag" which is handy when transporting tools to and from work locations. In the beginning, this worked fine when all I had was a regular drill and an impact driver. Then came the the reciprocating saw, and then the circular saw, and then ... well, you get the idea. Soon, I had bags with the tools inside stuffed in any storage location I could find. I even purchased a plastic storage cabinet thinking I could set the tools in there without the need of the bags.  Well, after purchasing a cutoff grinder and ...